Litter-Robot 4: laser board installation guide
This guide shows you how to remove and install the Litter-Robot 4 laser board. The unit uses downward-facing "curtain" sensors across the opening and into the globe to detect when a cat enters or exits while in the Home position.
Applies to: Litter-Robot 4.
Watch: laser board (cat sensor) replacement
What you'll need
- Phillips-head screwdriver (a magnetised screwdriver or tip helps)
Steps
- Make sure the unit is in the Home/Ready position. Press the Power button to turn it off, then unplug it.
- Remove the bonnet: press and hold the latches on both sides, lift and rotate it open, then lift it up and out of the hinge.
- Remove the fence from the bezel at the globe entrance, if installed.
- Remove the globe: grab the black handle on top, lift it out of the base, and set it aside.
- Remove the waste drawer and set it aside.
- Place the unit facedown (bezel down) on a solid, flat surface. Remove the ten (10) screws from the black bridge, then the four (4) screws behind the seal strips on the bezel.
- Tip the unit upright. With a hand on the drawer opening, carefully pull out on one side of the bezel to begin separating it from the bridge, then the other side, and remove the bezel completely.
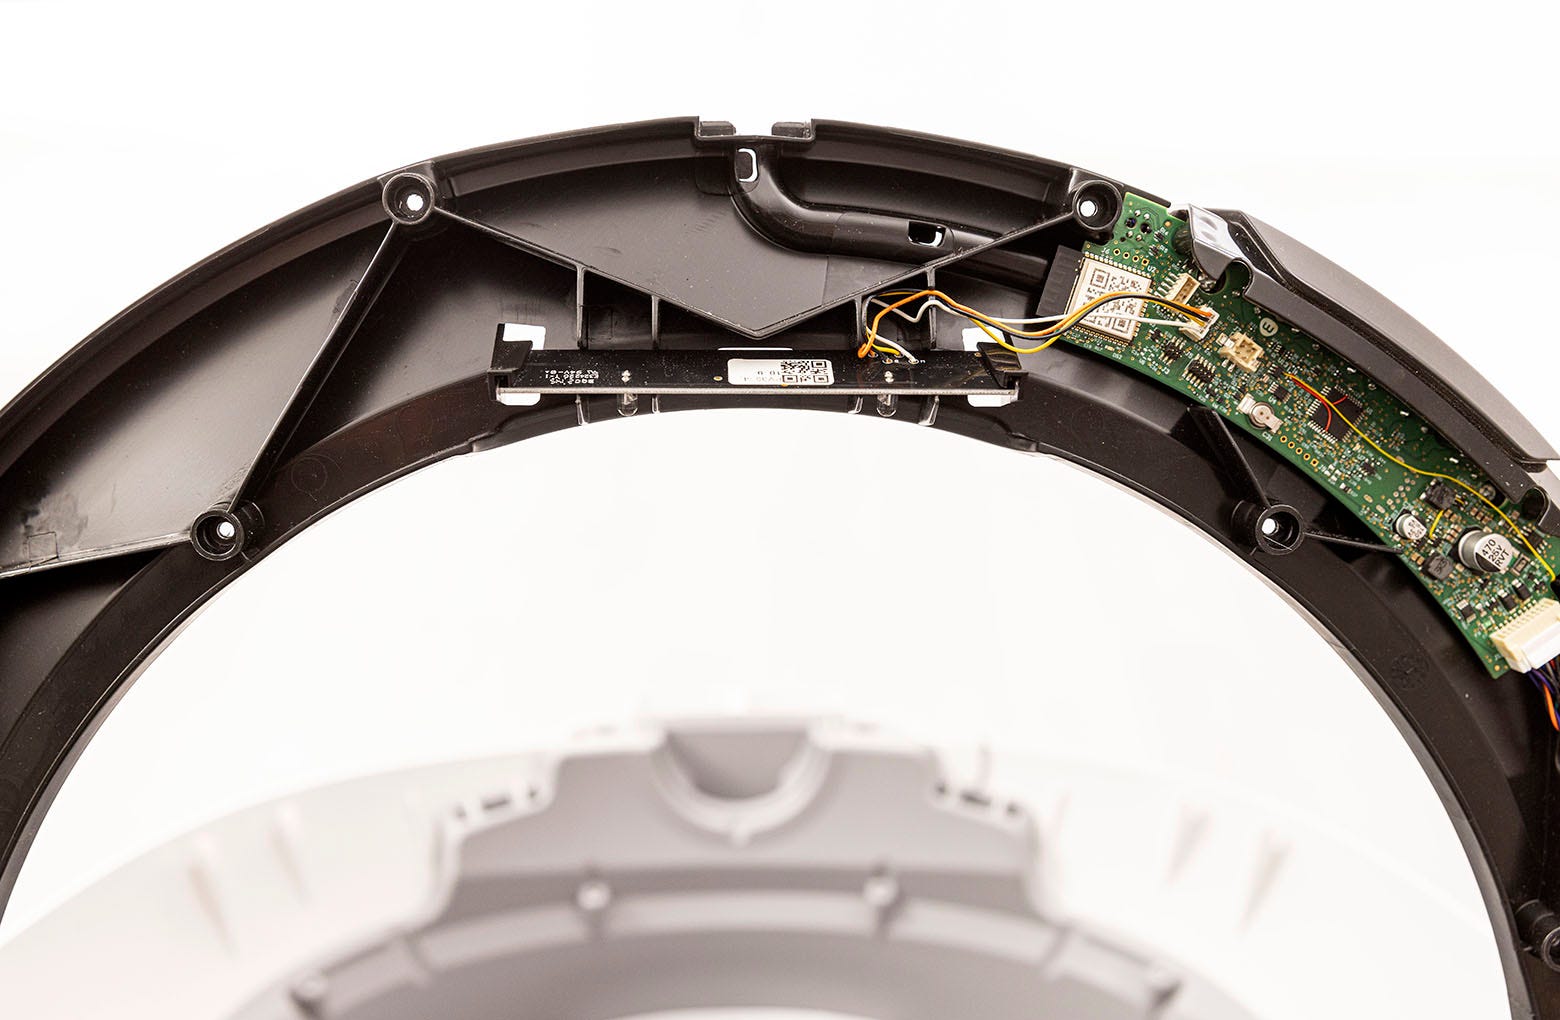
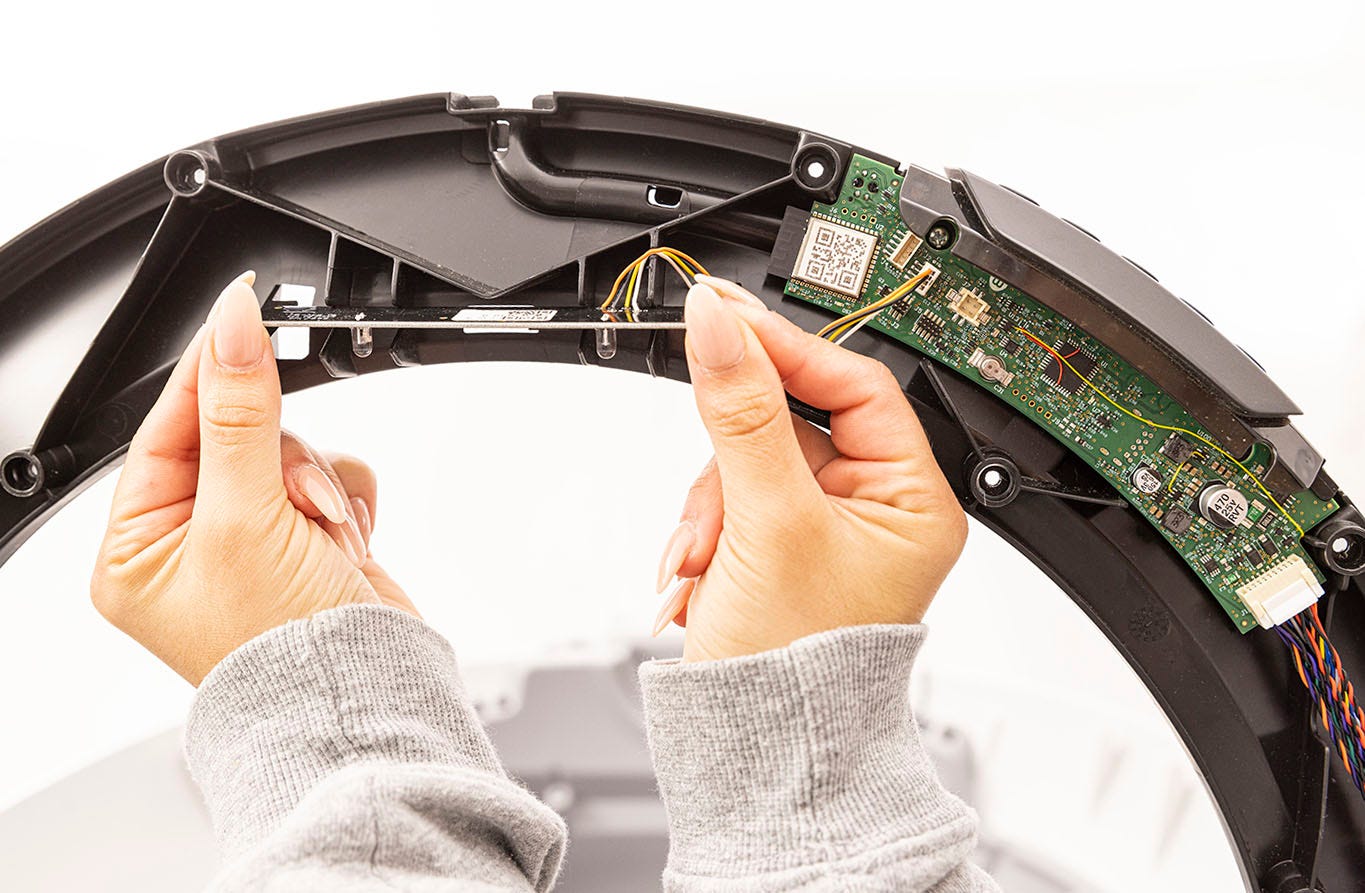
- Locate the laser board at the top centre of the unit.
- Gently disconnect the laser board from the main board by releasing the connector, then remove the old board.
- Install the new laser board: remove the tape covering the three sensors, connect the connector to the main board, and make sure the wires are in the retention slots and clear of screw locations.
- Replace the bezel (unit facedown) and fit the fourteen (14) screws into the bridge.
- Turn the base right-side up. Replace the globe: hold it by the handle and slide it into the base so the back sits flush in the rear bearing pocket, with the large black gear lined up with the small white gear.
- Replace the bonnet: place it into the hinge, rotate it down over the globe, and push down from the top until latched and secure.
- Reinstall the fence if desired, slide the waste drawer back in, then plug the unit in and power it on.
Related articles
- Litter-Robot 4 bezel installation guide
- Litter-Robot 4 safety features
- Litter-Robot 4 calibrating OmniSense laser sensors
Still need help?
Need a hand? Contact the Urban Pet Products support team at support@urbanpetproducts.com.au or through the contact form at support.urbanpetproducts.au.
Was this article helpful?
That’s Great!
Thank you for your feedback
Sorry! We couldn't be helpful
Thank you for your feedback
Feedback sent
We appreciate your effort and will try to fix the article