Litter-Robot 4: base installation guide
Replacing the Litter-Robot 4 base is straightforward. Follow these steps to remove the old base and install a new one.
Applies to: Litter-Robot 4.
Steps
- Make sure the unit is in the Home/Ready position. Press the Power button to turn it off, then unplug it at the bottom of the base. Keep the power supply — you'll reuse it.
- Remove the bonnet: press and hold the latches on both sides, lift and rotate it open, then unlatch the centre tab from the catch clip on the frame behind the unit and set the bonnet aside.
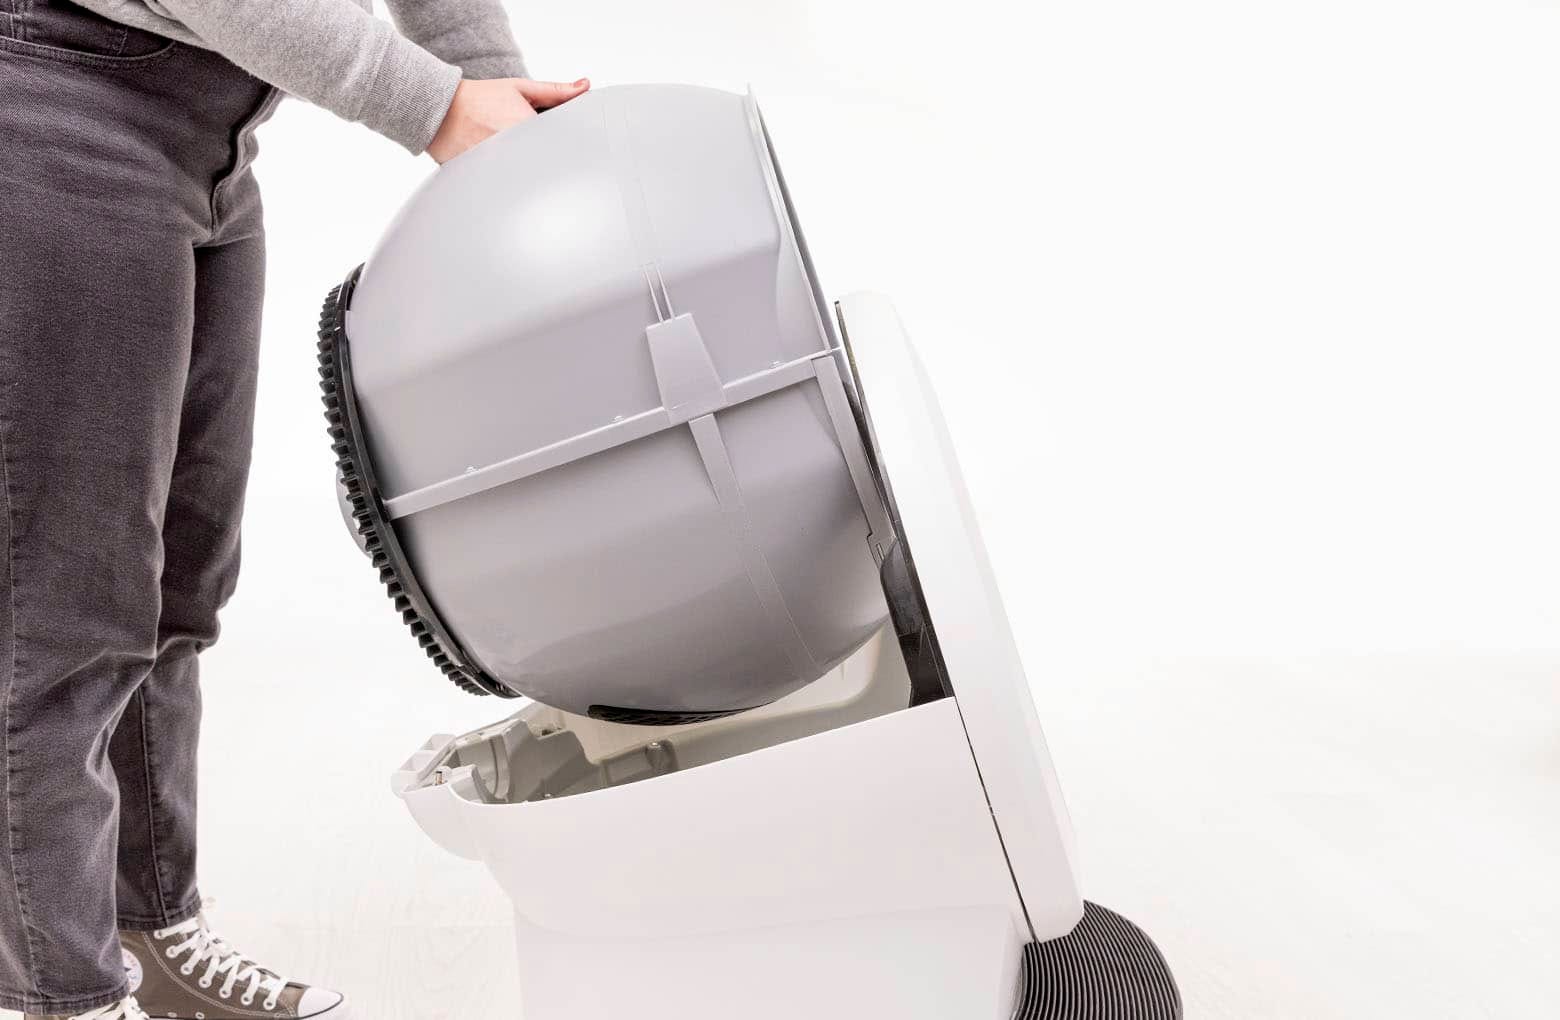
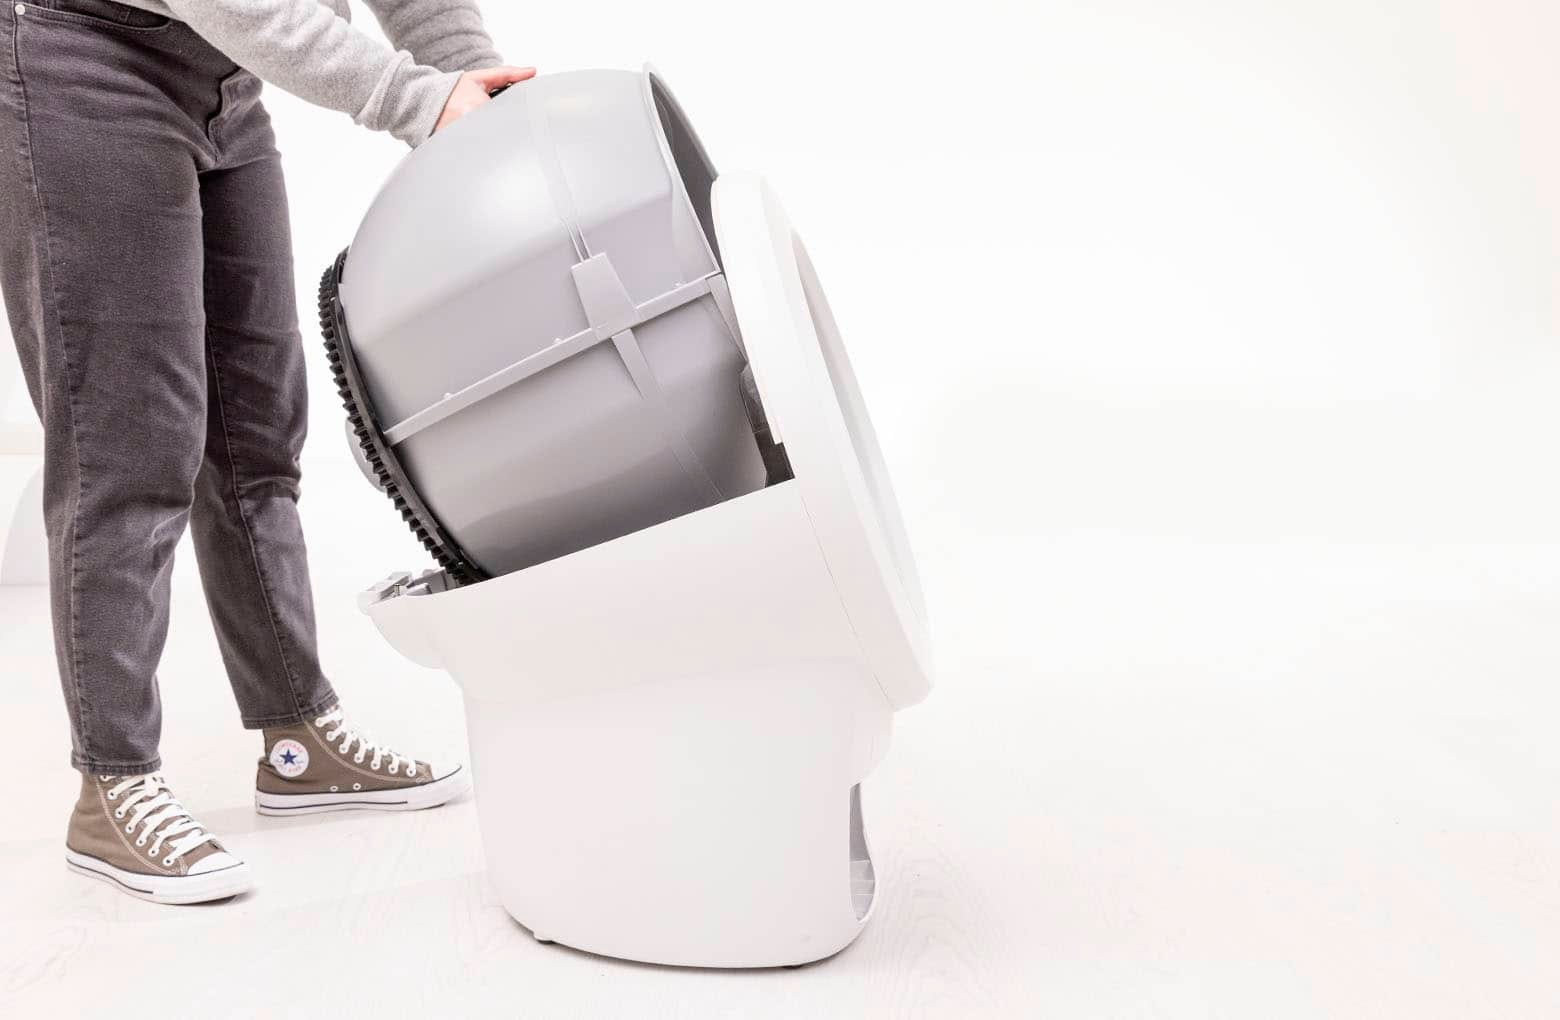
- Remove the globe: grab the black handle on top, lift the globe off the base, and set it aside.
- Remove the waste drawer from the base and set it aside.
- Set the old base aside to make room for the new one.
- Remove the new base from the box and place it in the desired location near a power outlet. A firm, level surface is required for accurate cat detection and weight readings.
- Replace the globe: hold it by the black handle and set it onto the new base. Make sure the back of the globe sits flush in the rear bearing pocket — the large black gear on the rear of the globe lines up with the small white gear in the base.
- Replace the bonnet: latch the centre tab into the catch clip on the frame, then rotate the bonnet down over the globe and push down from the top to make sure it is latched and secure.
- Slide the waste drawer into the new base.
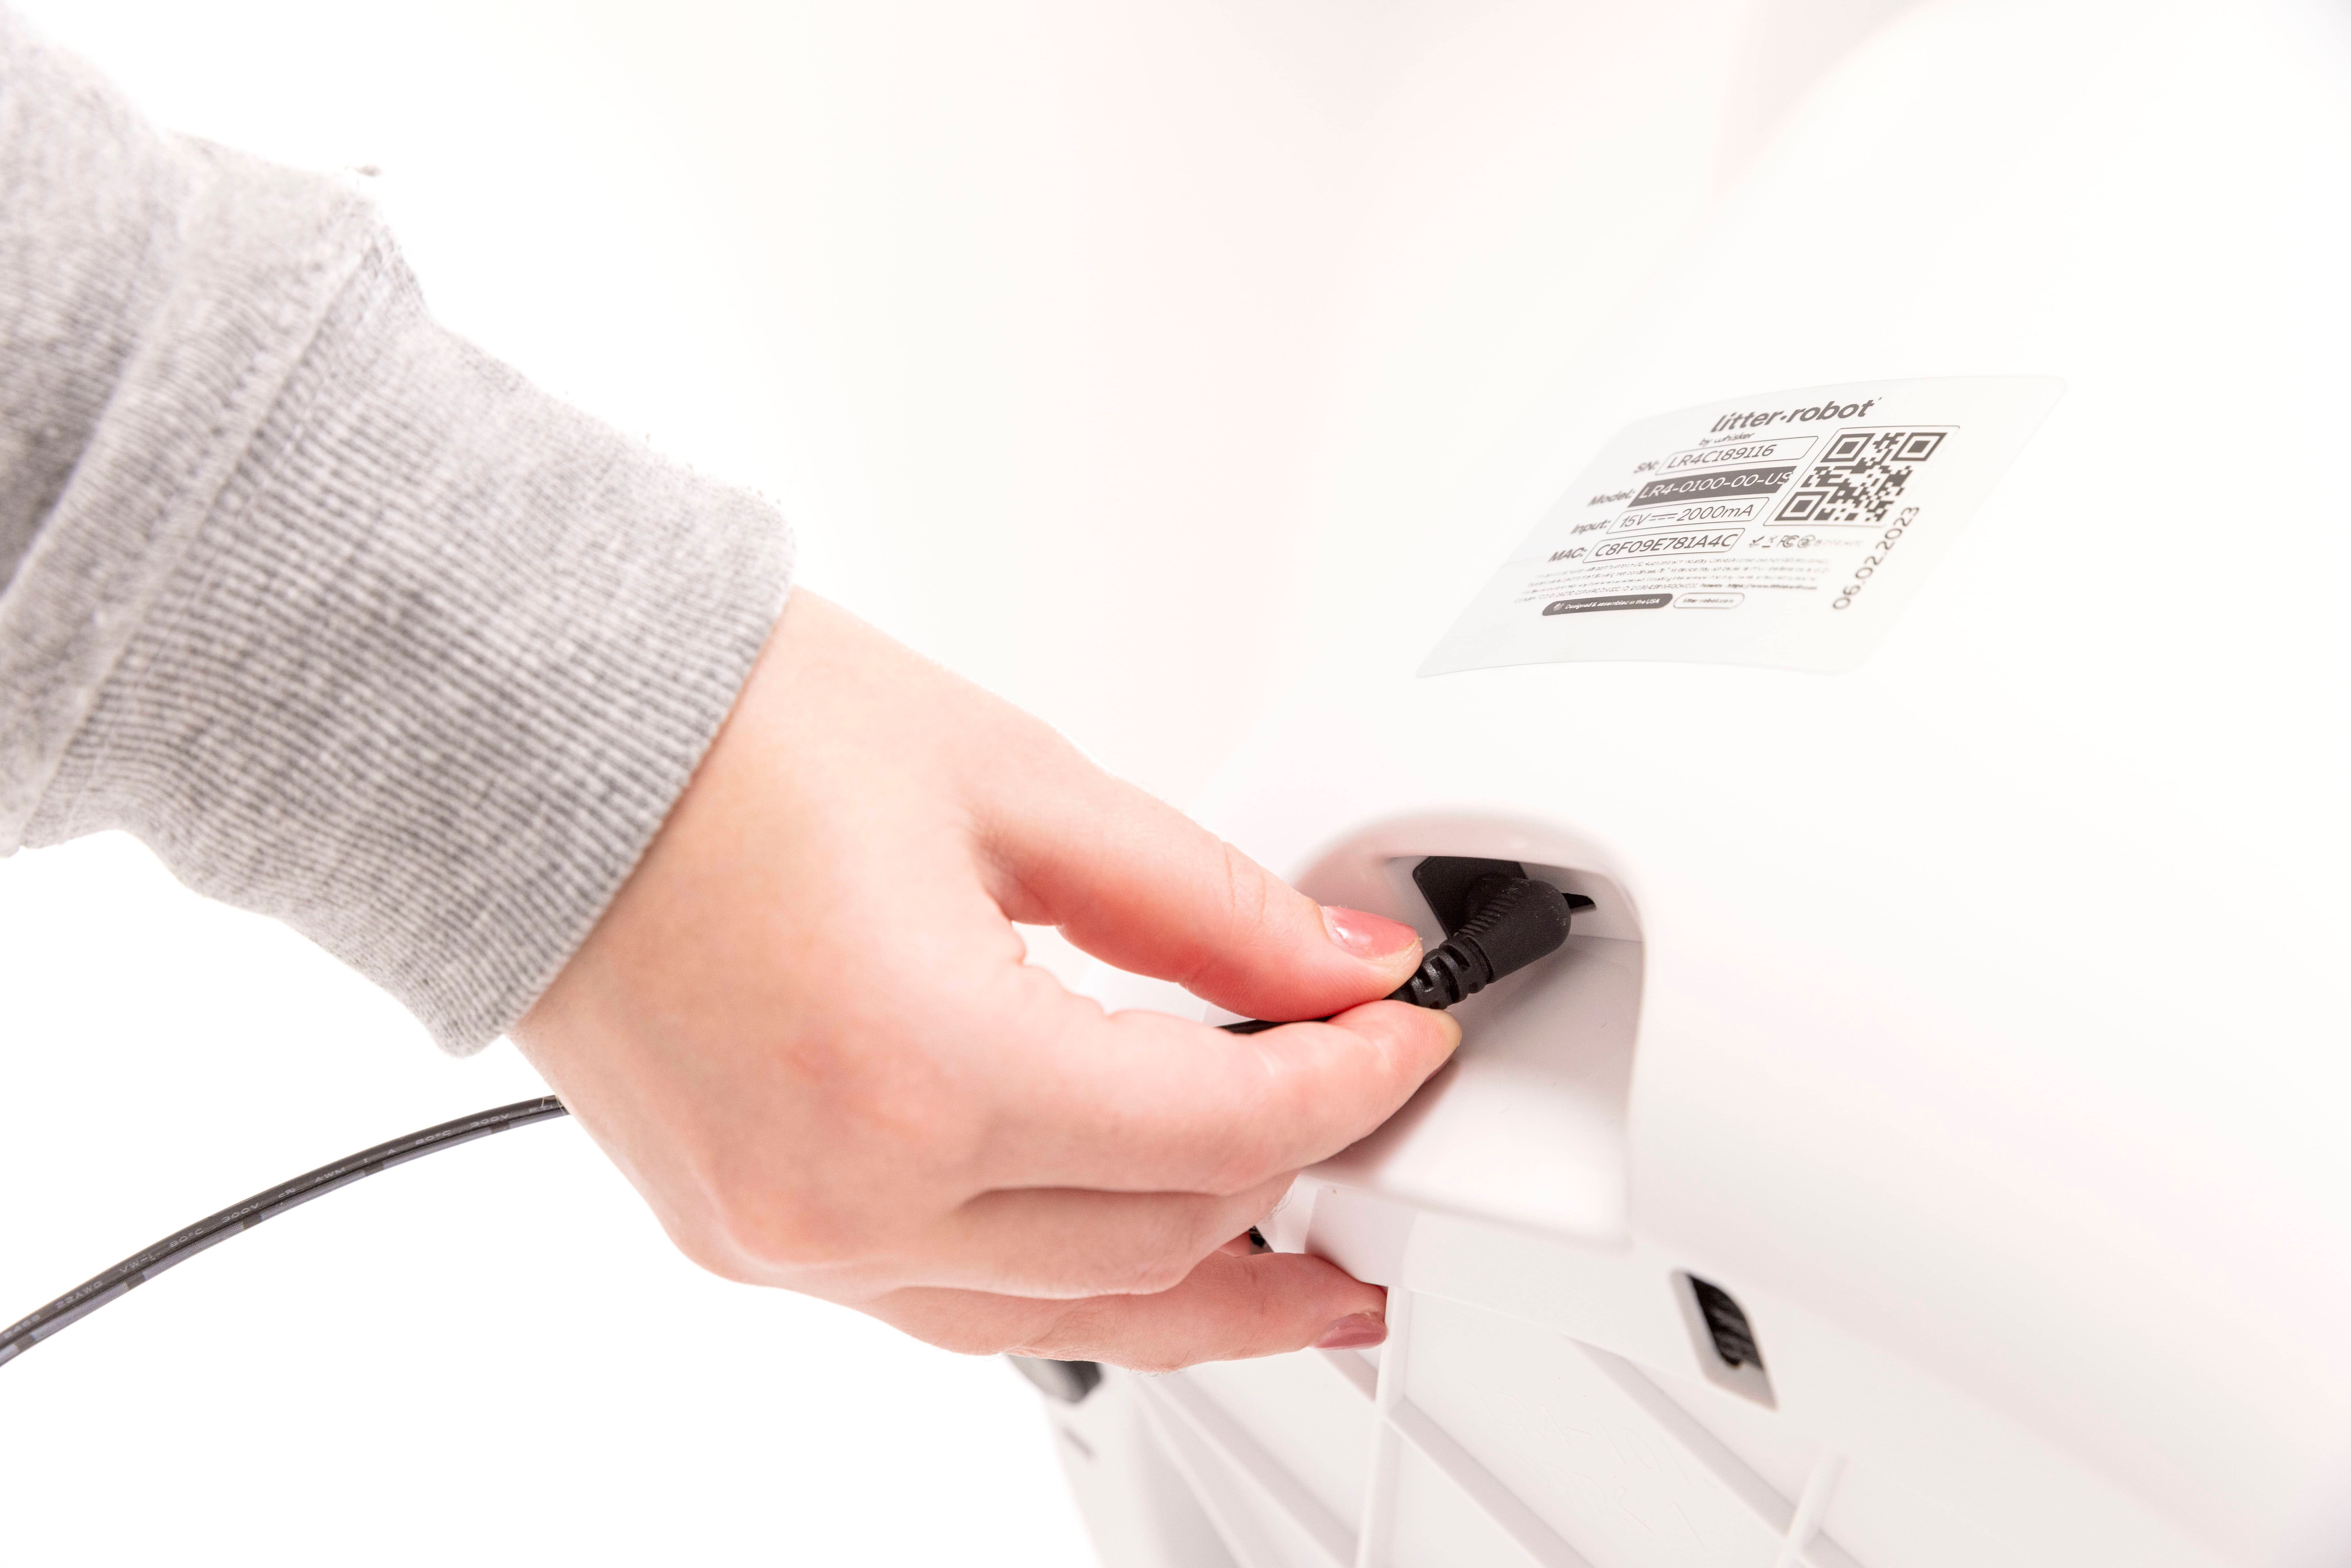
- Plug the small end of the existing power supply into the power input on the back of the base (tilt the unit forward for easier access).
- Plug the power adapter into a wall outlet if it isn't already.
- Press the Power button on the control panel.
Onboard the new base
The new base has a new serial number, so it must be onboarded to the Whisker app.
- Open the Whisker app and follow the onboarding instructions. Once complete, your Litter-Robot 4 appears as a new robot in the app.
- Delete your old robot: select the old Litter-Robot 4 from the dashboard, tap the Settings gear, tap Delete Robot, then tap Yes.
Related articles
- Whisker app: onboarding your Litter-Robot 4
- Litter-Robot 4: assembly and disassembly
- Litter-Robot 4 no power
Still need help?
Need a hand? Contact the Urban Pet Products support team at support@urbanpetproducts.com.au or through the contact form at support.urbanpetproducts.au.
Was this article helpful?
That’s Great!
Thank you for your feedback
Sorry! We couldn't be helpful
Thank you for your feedback
Feedback sent
We appreciate your effort and will try to fix the article